Our little “home library” is easily my favorite room in the whole house. When we first moved in, I had dreamed of what this space would become and I was eager to bring our vision of adding built-in bookshelves to life! We now have a designated space to store all of our books and now I can’t wait to cozy up and start reading! In this quick little tutorial, I will walk you through all the steps of how we designed, built & styled these built-in bookshelves. I hope you love them as much as we do!
*Disclaimer: this post does contain affiliate links which I may receive a commission for if used at no additional cost to you. Read more about my advertising policy here.
DIY Built-in Bookshelves: Creating the Vision
To start, I have a little confession to make. When we originally dived into this project a few years ago, I had was head over heels for the rustic, farmhouse design style. Don’t get me wrong, there are elements of farmhouse that I still love, but my vision for our home has really evolved since then and we have really been focusing on pulling in more notes of vintage and antique-inspired aesthetics. I have been loving the shift as it has allowed us to really dive into what makes this space ours. While we still have a long way to go with the rest of our home, I knew that finally finishing up this corner was going to require a bit of a makeover.
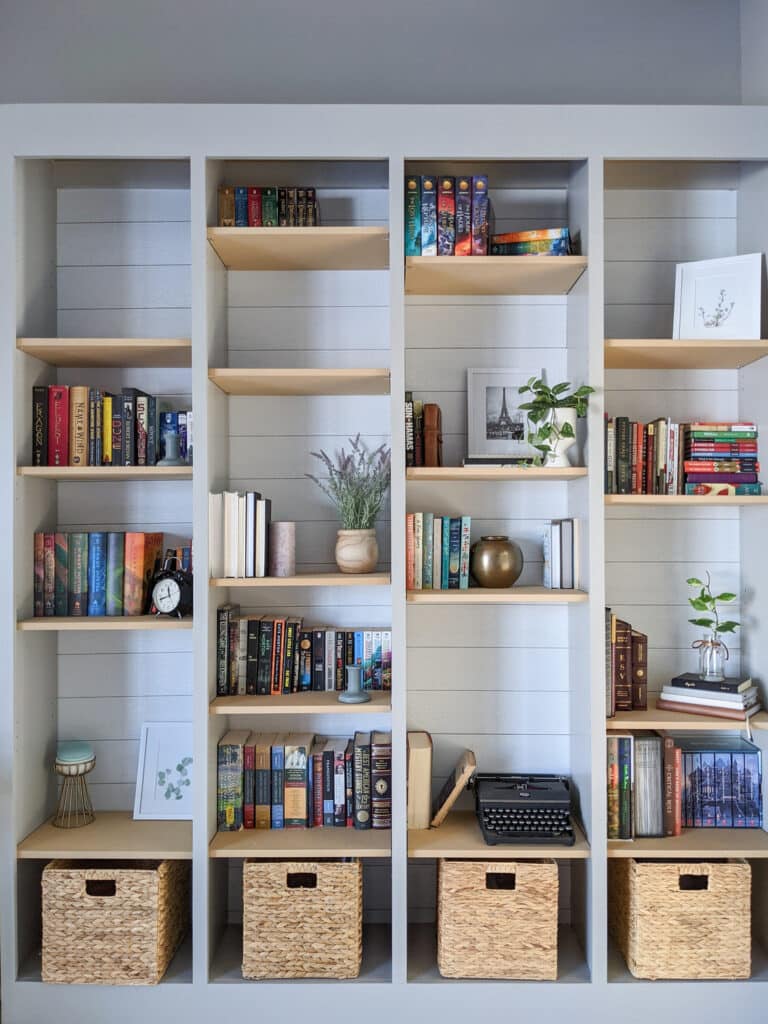
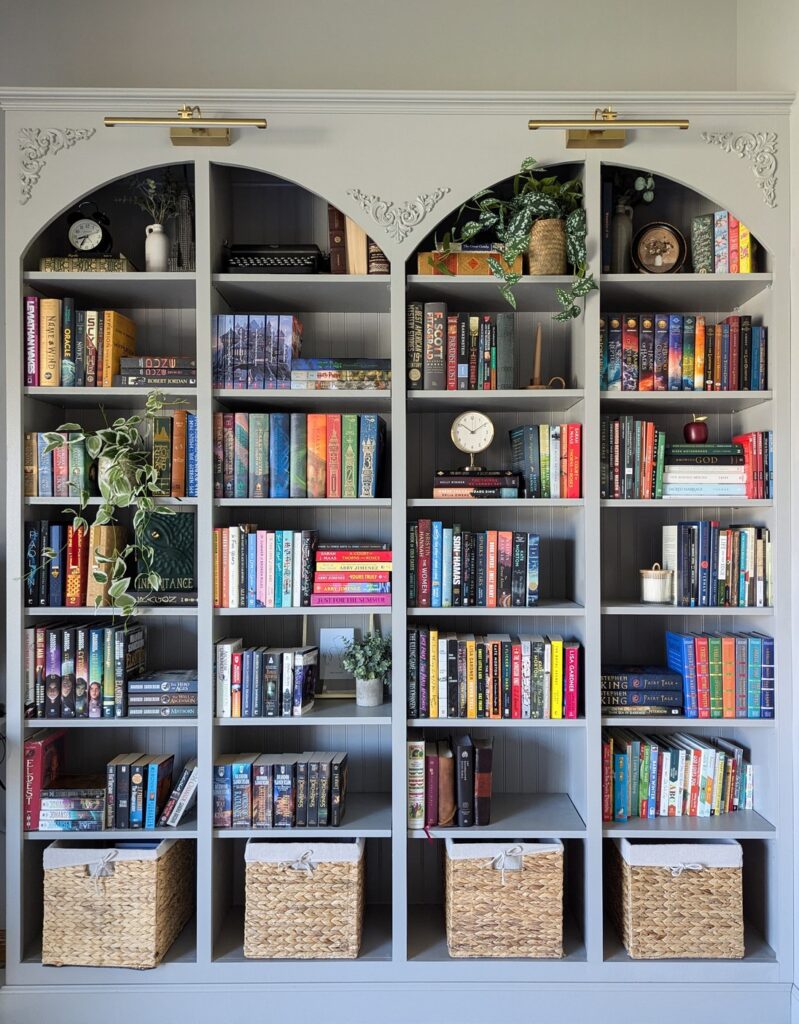
To paint the picture for you, here is a comparison of where we left off with the built-in bookshelves a couple of years ago and where we are today after completely wrapping up all finishing touches:
I truly do love the finished product and it warms my heart to think that these shelves will hold some of our family’s favorite stories for years to come!
First Steps
We started with a blank wall and drew out a rough sketch of what we wanted the finished product to look like. This involved measuring out how tall we wanted the shelves, how far apart we wanted each column to be, how many shelves we wanted and how deep each one needed to be, and how much of a base we wanted on both the top and bottom for molding and trim. We landed on 8 feet tall, 20 inch wide columns and measured out the shelf heights later. Once we had all of our measurements, we decided on materials.
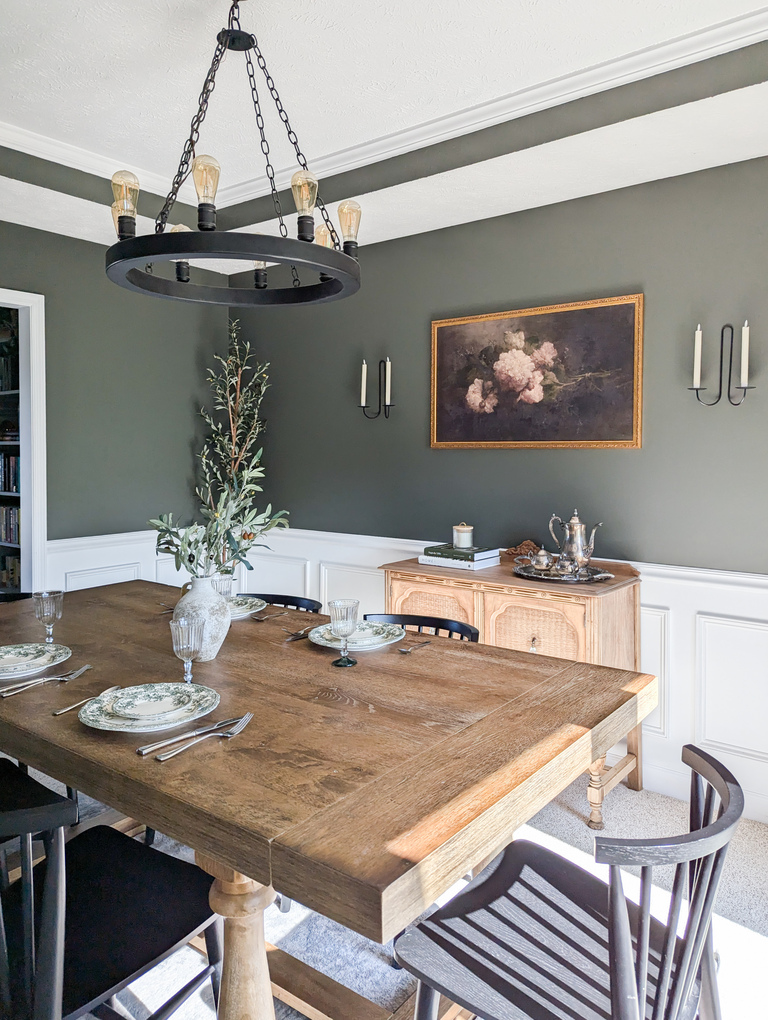
We settled on MDF board because of its affordability and easily paintable surface. Also, we decided to keep the paint color the same as the existing wall color for now, but we may change this down the road. For now, I really am loving the dark moody gray that provides a great canvas for decorating and storing books. Color is Dorian Gray by Sherwin Williams.
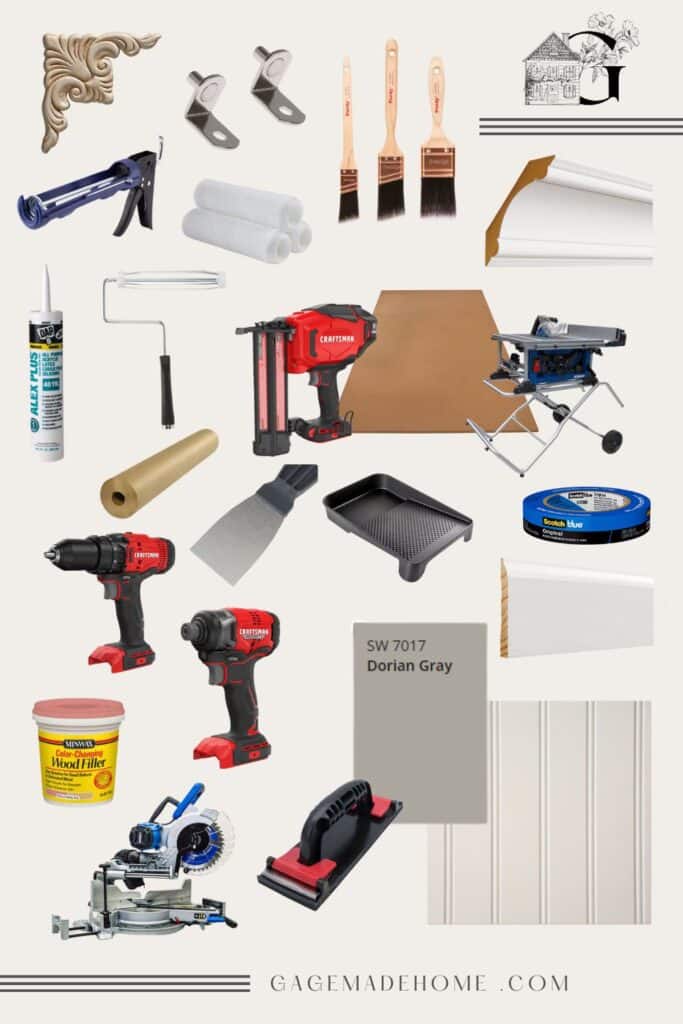
After deciding all of these basic steps, we headed to our local Lowe’s Home Improvement store (which, by the way, is our go-to for all DIY projects!). They will even cut down your wood to size if you don’t have a table saw at home!
Most of the essential tools we used for this project are rounded up here and decorations used to fill the shelves can be found here.

Assembling the Built-in Bookshelves
Once we had all of our materials, it was time to start assembling! We nailed the basic frame of each column together before bringing them into the space and we put up shiplap wallpaper on the backside to give the shelves some dimension. Here is what each bookshelf column frame looked like:
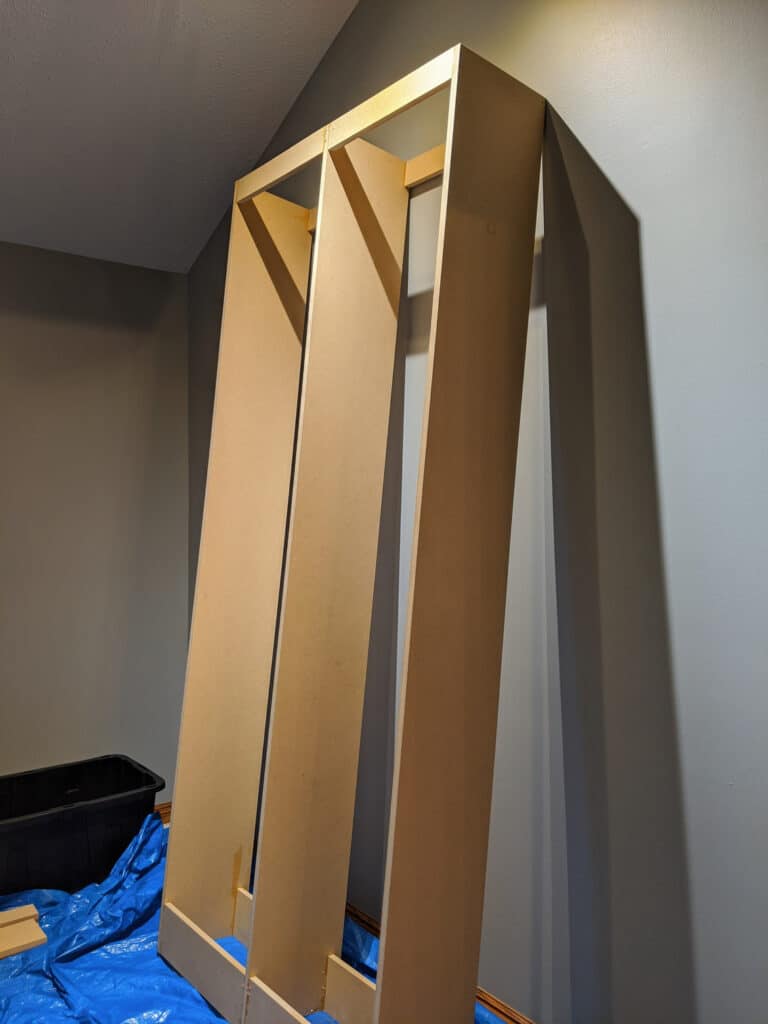
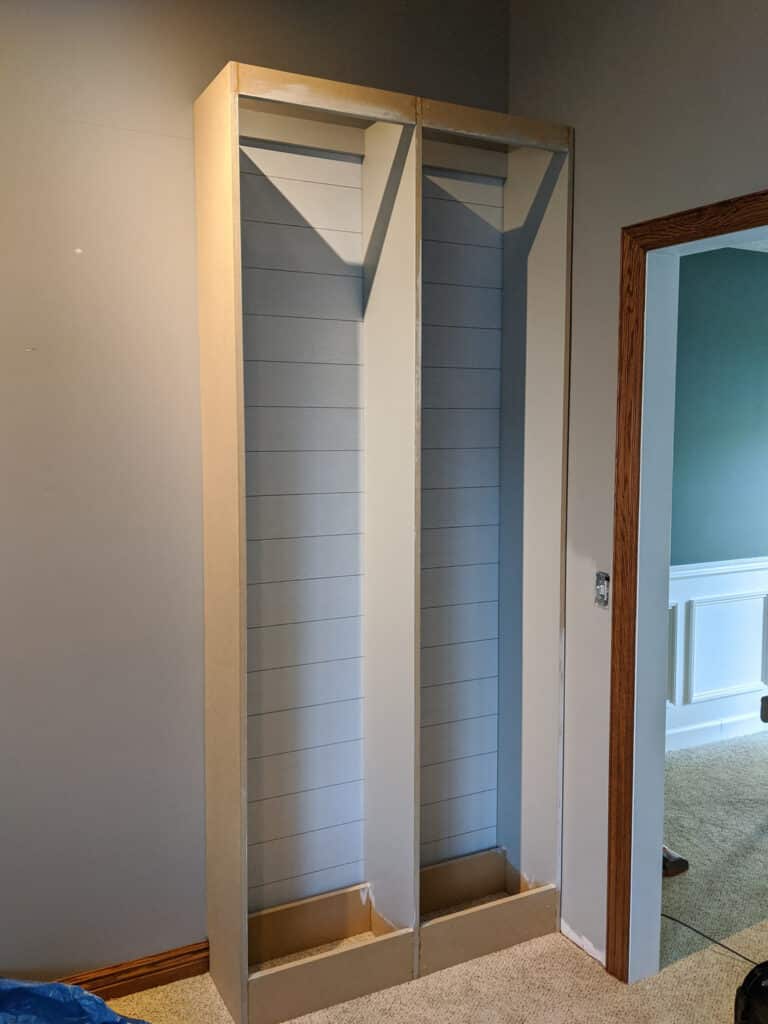
As you can see, we had two sets of two-column frames built out that we assembled side by side against the wall. We made sure to add a thinner piece of wood on both the top backside of the shelf, and bottom back side so that we could nail the entire unit to the wall easily. This was probably the hardest part because it just required a lot of attention to detail to make sure each column was the same height and length.
Once both columns were attached to the wall, we cut down a thin piece of wood to act as a trim covering the gap between them and wood filler was used to cover up any nail holes.
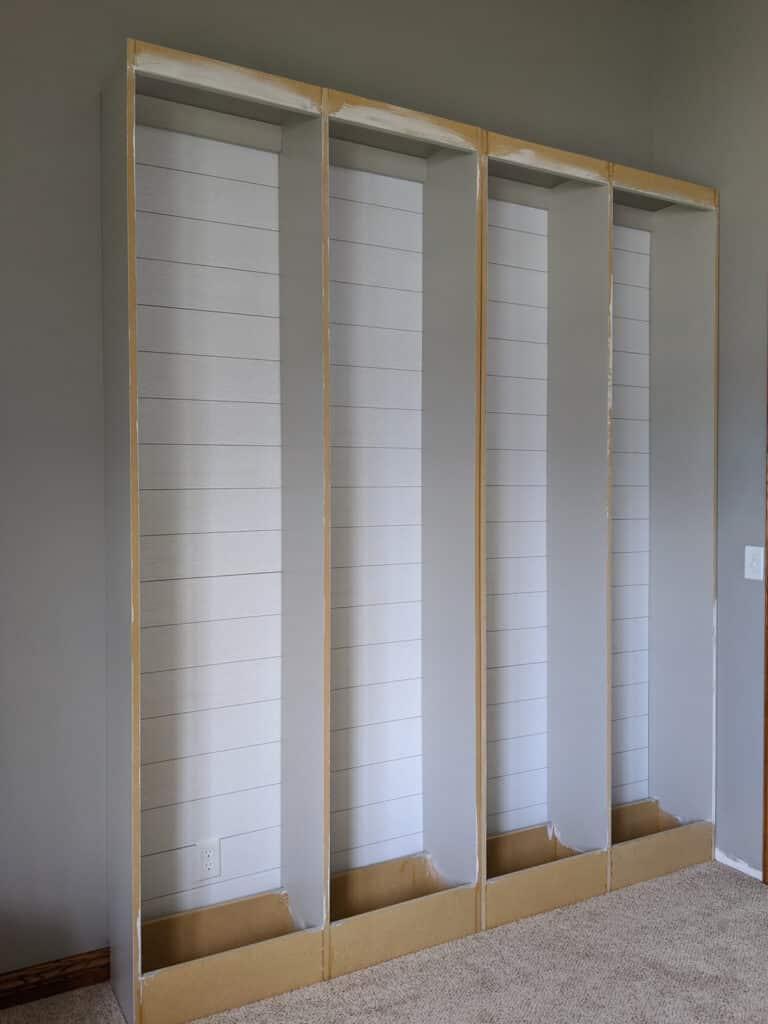

After this, we cut our shelves down to size and assembled them into the columns by drilling little peg holes down the sides as pictured below. Metal shelf clips were installed for the shelves to sit on. Additional peg holes were drilled to give us the flexibility of mixing shelf heights.
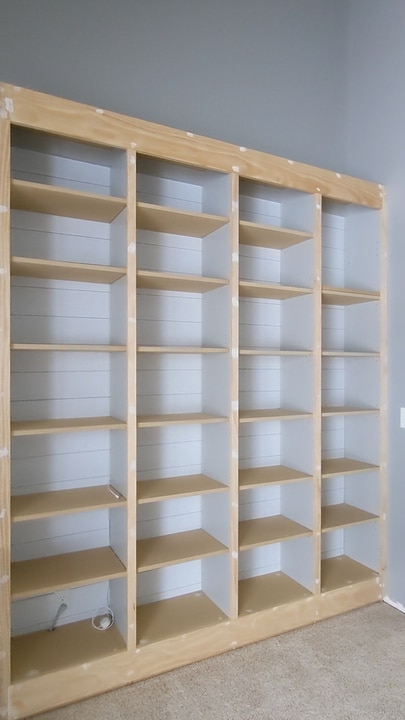
The scattered shelves were great for when we didn’t have as many books to store.
We also settled on leaving the shelves a raw wood color because we thought it looked nice and matched the “farmhouse” vibe we were initially going for. Recently, however, we decided to re-tackle this corner so that it matched our evolving style of a more modern vintage vibe and I think it totally took these built-in bookshelves to a whole new level!
Elevating from Builder’s Grade to Luxury
As I previously noted, our initial vision for the design style of these built-in bookshelves was farmhouse. But over time, our home vision evolved and we have really embraced more of a modern vintage theme throughout our home. After establishing this shift in other areas of our home, we decided to revisit this corner and give it a little makeover.
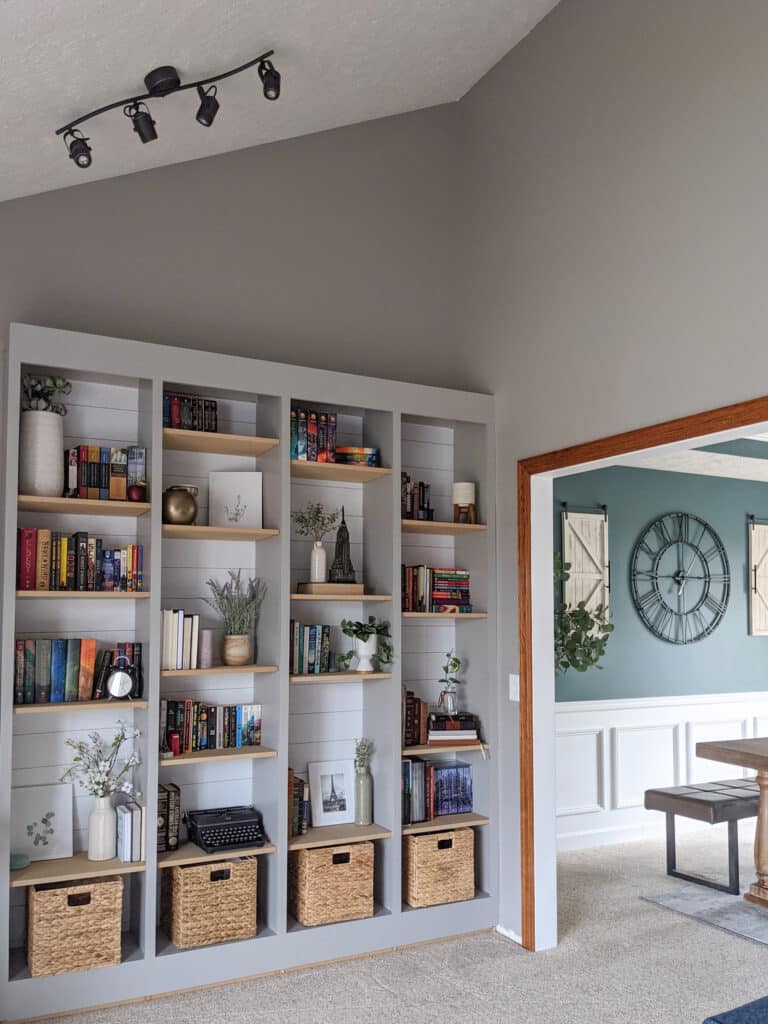
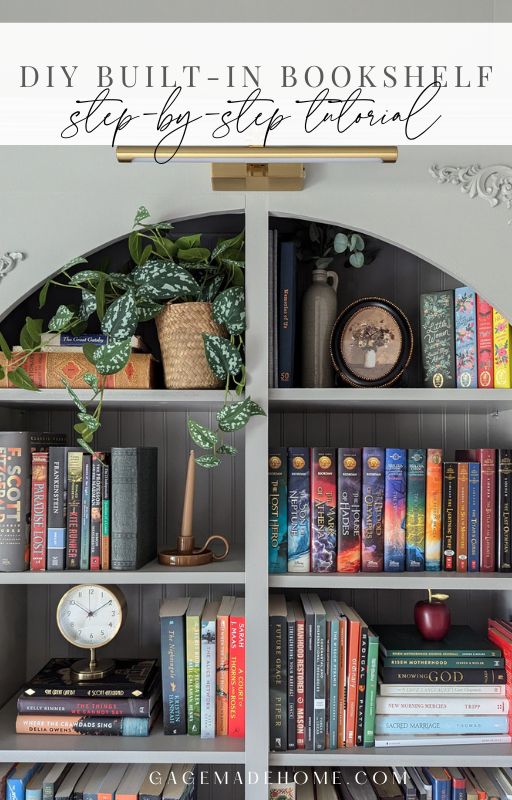
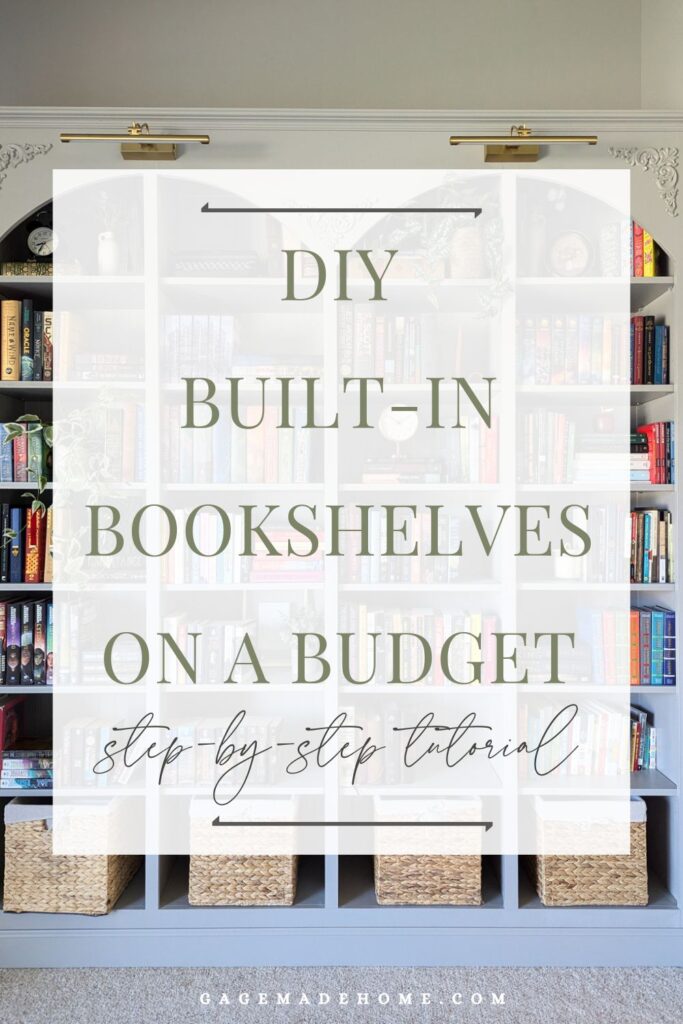
It only took a few very minor changes to make a HUGE difference to this space. We added half arches on each column to create the illusion of a full arch covering each two-columned section with leftover MDF board. Then, we covered up the shiplap wallpaper on the backside of the shelves with beaded paneling and I personally believe that this is what really took these shelves to the next level. Our shelves are 8-feet tall and we were able to get 8-foot beadboard sheets from LOWE’S which were then cut down to the correct column length before being nailed to the wall. We caulked the gaps on all sides and used paint to cover up any nail holes and minor imperfections.
Next, we added crown molding to the top of the entire shelf, and baseboard trim to the bottom which really helped to give it that “built-in” look.
We also ditched our original idea of having mixed shelf heights deciding that a more uniform look would result in a more high-end finish. This also ended up giving us more shelf space to store more books, so it was definitely the way to go! But I am glad we still have the extra pin holes so that we can change our mind in the future if we want.
Budget-Friendly Tip:
Alternatively to building shelves from scratch, you could install pre-built bookshelves side by side against any wall and connect them together with trim to give the illusion of built-ins. This becomes an easier and more affordable alternative to a project like this!
Final Touches & Decorating our Built-in Bookshelves
After painting the shelves to match, we felt like the blank space above the arches needed to be filled in with something. We started dreaming up a few ideas and eventually landed on adding these antique brass picture lights and some wood appliques to each corner.
I really love how these small minor finishing touches really helped bring it all together. The brass finish on the gallery lights added that pop of color that the space needed and the wood appliques added some much-needed visual dimension to the empty corners. Plus, it ties in the subtle antique theme we were hoping to achieve.
Once all the books were organized, I added just a few pieces of decor to some of the blank spots. We also reserved the top shelves in each column for some of our personal favorite pieces of decor just to add personality to the space. This might change as our book collection grows, but for now, I love how it looks!
And that’s a wrap! I hope you enjoyed this tutorial and found it helpful if you are looking to DIY built-in bookshelves in your own space. If you have any questions at all, drop them in the comments below and I would be more than happy to help out! Looking for more DIY tutorials and home decor ideas? Check out my home archives here for more attainable and affordable inspiration!
PIN IT:


")
4 Comments
These are gorgeous and exactly what I am going to do. Is there any way you could give us some details on construction, like how you attached the shelves? Thank you for sharing this.
Thank you so much Daniel! I am glad you like them! As far as construction, we honestly kept it pretty simple and just used a nail gun to nail it all together and into place on the wall. The individual shelves are installed by drilling peg holes into the sides and then using metal shelf clips to hang the shelves onto. This way we can adjust the heights of the shelves/add more in the future if we want! Hope this helps but let me know if you have any other specific questions 🙂
Gorgeous! Wondering how you created such perfect arches?
Thank you so much Amy! It was a little tricky especially since we did one arch every 2 columns, but we traced a little stencil essentially by putting the MDF board pieces up temporarily and then put a pencil on a string and drew a perfect circle so it would mark on the MDF boards where we needed to cut. Then we made a few fine tuned adjustments once they were hung up with a jigsaw but it worked pretty well this way. We added the arches after the columns were up, but if I had known ahead of time that we were going to want them, I would have made them before assembling the whole shelf unit. It would have been much easier! Hope this helps!!